How to Delete a Reading From Contour App
Frequently asked questions
At that place are two means you tin set up your CONTOUR®PLUS ONE meter: on the meter itself, or by using the CONTOUR®DIABETES app.
For instructions on initial setup from the meter itself, please see the User Guide that you received with your meter.
To gear up your meter from the app, download the CONTOUR®DIABETES app, open the app, tap 'Get started' and follow the instructions. This will set upwards the meter and app at the aforementioned time.
If you're starting from scratch with your Contour®PLUS I meter and CONTOUR®DIABETES app, we recommend that you fix upwardly the app first. The meter is quickly and easily set up during the app setup when get-go getting started.
To pair a meter to the CONTOUR®DIABETES app:
- Make certain the Bluetooth® setting on your mobile device is switched on
- Go to: Main Menu > Settings > My Meters
- Tap '+ Pair a Meter' and follow the instructions
- When your meter is successfully paired, the smartLIGHT™ on the meter will smoothen blue for a few seconds
- Later on a CONTOUR® meter is paired, the Meter Settings screen displays
- Plough settings off if needed, and then tap 'Continue' to save the meter settings
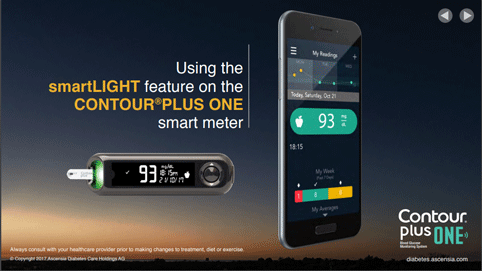
The blood glucose reading colours in the Contour®DIABETES app friction match the colours of the smartLIGHT™ feature on the Profile®PLUS ONE meter to let yous know how your blood glucose reading compares with your target range.
Green = within target
Amber = above target
Red = below target
When you lot open up the Contour®DIABETES app for the start time, you will be prompted to create a Profile®CLOUD business relationship. Creating an account ensures that your personal data is backed upward securely, and allows you to access it from whatsoever of your uniform mobile devices.
To create an account from the initial app setup, just follow the instructions on screen.
- When asked for a Contour®Deject ID enter your electronic mail address. You should use a personal email address that you lot check often
- Next you lot will need to answer a series of questions, which are used to create a section called About Me. (Your Virtually Me section tin can be edited afterward account creation and can exist found under My Profile in the Bill of fare section of the app.)
- Verify account by clicking the link emailed to you past Contour®Diabetes Solutions
Tap 'Continue' on the app screen
If you accept been using the Contour®DIABETES app in Guest mode and want to create an account:
- Become to: Settings > Create an account
- Follow the instructions on screen
- Verify business relationship by clicking the link emailed to you lot by Profile®Diabetes Solutions
Tap 'Proceed' on the app screen
Your meter and app must exist in close range of each other to stay connected. Endeavour moving your meter and mobile device closer together.
Using the CONTOUR®PLUS ONE meter
There are two ways you tin can prepare upwards your CONTOUR®PLUS ONE meter: on the meter itself, or by using the Profile®DIABETES app.
For instructions on initial setup from the meter itself, delight see the User Guide that y'all received with your meter.
To set your meter from the app, download the Contour®DIABETES app, open the app, tap 'Go started' and follow the instructions. This volition fix the meter and app at the same time.
You can switch the meter on by either:
- Pressing and holding down the large, circular button on the right-hand end of the meter
or
- Inserting a CONTOUR®PLUS test strip into the meter (this will automatically plough the meter on)
Your CONTOUR®PLUS ONE meter should always be used with Profile®PLUS exam strips. These have been specifically designed for utilize with the meter.
You will receive a bottle of CONTOUR®PLUS examination strips with your meter, and can order subsequent bottles from your pharmacist when you need them. Never use other brands of examination strips with your CONTOUR®PLUS Ane meter.
The smartLIGHT™ feature on the CONTOUR®PLUS One meter gives yous instant feedback on your blood glucose results. It immediately identifies your results as above, below or within target range to help you make decisions. This feature can be switched off if yous prefer not to use it.
Green = within target
Amber = higher up target
Crimson = below target
Second-Chance® sampling is another useful feature of the Profile®PLUS ONE meter. If your first sample is insufficient to have a blood glucose reading, Second-Take a chance® sampling lets you use more blood to the aforementioned strip instead of using a new one. This may assist yous:
- Avoid having to prick your finger once again
- Waste fewer strips (and lancets)
The Second-Take chances® sampling characteristic will cause your CONTOUR®PLUS ONE meter to beep twice and display a flashing test strip icon. Within 60 seconds, utilize some more blood to the test strip and then there is plenty for the meter to measure your blood glucose. Once y'all have added enough blood, the meter will automatically take a reading as usual.
Meter settings cannot be changed from the meter while the meter is connected to the app. To change settings on the meter either:
- Gyre to the 'Settings' symbol on your Contour®PLUS 1 meter and press OK. This will automatically disconnect your meter from your mobile device
Or
- Turn your CONTOUR®PLUS 1 meter off and walk away from your mobile device to disconnect from the app, then turn your meter on and become to Settings to make any changes
These symbols are Meal Markers. Meal Markers allow your meter to compare blood glucose readings against the related target ranges, so that the smartLIGHT™ characteristic can point whether your blood glucose is higher up, beneath or within target range.
You lot tin can select the appropriate mark on your meter each time yous take a claret glucose reading. At that place are three variations of the apple symbol:
![]()
Fasting Meal Mark
Choose this if you are testing your blood glucose after nigh viii hours without eating
![]()
Before-meal Meal Marker
Choose this if you are testing your blood glucose within one hr earlier a meal
![]()
Subsequently-meal Meal Marker
Choose this if yous are testing your blood glucose inside 2 hours after the first bite of a meal
Setting up the CONTOUR®DIABETES app
If you're starting from scratch with your CONTOUR®PLUS Ane meter and Profile®DIABETES app, we recommend that you gear up the app first. The meter is speedily and easily set upwardly during the app setup when first getting started.
Thedevice compatibility document is a reference list that shows the mobile devices that have been verified for apply with the Profile®DIABETES app. In that location are other models of mobile devices that may work, that have not even so been tested past Ascensia. If your device is not on this list, you may be able to download the app and see if y'all can pair your meter to the app. Please note, nevertheless, if your device is non on the listing, Ascensia cannot guarantee all functionality will work because the device has not been verified, even if pairing is successful. Please visit usa again in the future as nosotros are continuing to update the list of verified devices regularly.
The Contour®DIABETES app is uniform with Android devices using Android Operating System version v.0 (Lollipop) and college, with ARM-based processor and BLE Radio function. Information technology is uniform with Apple tree devices using Apple iOS 8 and higher, with BLE radio function.
If your device does not meet the minimum requirements described higher up, you will need to update the operating organization. If your device does not support the required version of the operating system, your volition need to upgrade your device to one that does in lodge to use the Profile®DIABETES app.
Device compatibility document
Firstly, cheque that your device uses either Apple iOS or Android.
To download the Contour ® DIABETES app onto an Apple device:
- Open up the App Store on your device
- Search for 'Contour diabetes'
- Select 'CONTOUR ® DIABETES app' from the search results
- Tap 'Get', then 'Install'. Y'all may be prompted to enter your iTunes account information. Tap 'OK' one time you are washed. The download process will and so begin
- If you are however in the App Store, the 'Install' button volition get an 'Open' push button. Y'all tin either tap this to open the app or select the app icon from your device home screen
To download the Profile ® DIABETES app onto an Android device:
- Open the Google Play Store on your device
- Search for 'Contour diabetes'
- Select Contour ® DIABETES app from the search results
- Tap 'Install'. The download process volition then begin
Once you have downloaded the Profile ® DIABETES app, go on it somewhere on your mobile device that you can access hands, similar your habitation screen or dock.
The initial setup of the CONTOUR ® DIABETES app is simple.
- Open up the app by tapping on the CONTOUR ® icon on your mobile device
- Select your state from the list
- Select the language you would similar the app to utilise
- Tap 'Ostend' to proceed
- Adjacent you will need to read and accept the app Terms and Weather. Tap 'Accept' to continue
- You will now see the Welcome screen of the app with 3 options: 'Get started', 'Take a tour', 'Sign in'
- Tap 'Get started' and follow the instructions on screen to fix upwards your CONTOUR ® DIABETES app

When y'all start using your Contour®PLUS 1 meter with the CONTOUR®DIABETES app you will need to pair the two devices. The app and meter will then seamlessly connect and sync using Bluetooth ® technology. The Bluetooth ® setting on your mobile device and meter will demand to exist switched on for the pairing and each time you test your blood glucose so that the app tin can sync the reading.
You lot tin can turn a meter setting off or on from the meter using the following steps:
- Turn off the meter and move abroad from your mobile device
- Turn your meter on
- Scroll to Settings
- Press 'OK' on each screen until you find the setting to change
- Use the upwards and downward arrows on the outer ring to alter the setting. Press 'OK'
Pairing and unpairing meters to the CONTOUR®DIABETES app
To pair a meter to the CONTOUR ® DIABETES app:
- Make sure the Bluetooth® setting on your mobile device is switched on
- Go to:Master Menu > Settings > My Meters
- Tap '+ Pair a Meter' and follow the instructions
- When your meter is successfully paired, the smartLIGHT™ on the meter will smoothen blueish for a few seconds
- Later on a Profile ® meter is paired, the Meter Settings screen displays
- Turn settings off if needed, so tap 'Continue' to save the meter settings
Yes, y'all can pair multiple Profile ® PLUS ONE meters with the Profile ® DIABETES app, which merges together your claret glucose readings from the different meters. To do this, in the app go to:Main Menu > Meter Settings > My Meters
- Tap '+' and follow the instructions on the screen to add another meter
- Subsequently you have paired a meter, the Meter Settings screen is displayed. Change any settings that y'all demand to here
- Tap 'Continue' to save the meter settings
Note that but one meter tin connect to the app at any i time.
In the app become to: Primary Bill of fare > Settings > My Meters
Tap the meter you want to rename and type the new proper name over information technology.
Unpairing removes the meter from the business relationship and prevents the meter from connecting to the app and sending data back and along. Existing meter data remains intact in the app. An unpaired meter can be paired to the app once again at some other time.
If you need to unpair a meter from your CONTOUR ® DIABETES app, in the app become to:Main Carte > Meter Settings > My Meters
- Tap the meter you want to unpair
- On the Meter Settings screen, tap 'Unpair this Meter' and 'Confirm' when you lot are prompted
Or
Become to:Main Menu > Meter Settings > My Meters
- Swipe left on the meter you want to unpair
- Tap the cerise 'Unpair' button and 'Ostend' when you are prompted
Using the Profile®DIABETES app
Your meter must exist on and connected to the app if you want to change meter settings from the app. Only the Meter Proper noun and the Unpairing characteristic can be changed from the app when the meter is not continued.
Tap 'Bill of fare', 'Done', or 'X' to go back to the previous screen.
In nearly instances, yep. The app car-saves well-nigh items and does non always require you to tap 'Save'.
Yes. Your Contour ® PLUS ONE meter will sync with the Profile ® DIABETES app each time your meter and mobile device are within close range when you accept the Bluetooth® settings switched on. If you need to take a claret glucose reading without your mobile device close by, don't worry; your meter has enough memory to store up to 800 blood glucose readings and then it will save any results information technology reads until the next fourth dimension information technology can sync with the app.
- Viewing and making sense of blood glucose results
- Calculation additional information to blood glucose readings
- Transmission blood glucose readings
- Meal Markers
- smartALERTS™
- Test Reminder Plans and My Patterns
- Time and date sync
- Healthcare professional reports
- Target ranges
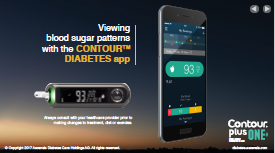
Viewing and making sense of blood glucose results
The blood glucose reading colours in the Contour ® DIABETES app lucifer the colours of the smartLIGHT™ feature on the Contour ® PLUS 1 meter to permit you know how your blood glucose reading compares with your target range.
Green = within target
Amber = to a higher place target
Red = below target
Claret glucose readings that accept been synced from the meter cannot be deleted in the app; but manually entered blood sugar readings can be deleted.
Tap the small graph to see the expanded graph or, whilst you lot are viewing My Readings in the app, plow your mobile device sideways so it is in a landscape position.
On the graph, circle symbols are blood glucose readings automatically collected from the meter via Bluetooth® engineering. Diamond symbols are readings that have been added manually. If you want to see detailed information for whatsoever given indicate, tap on the symbol on the graph.
The Averages mode lets yous come across claret glucose averages over a menses; the Standard mode shows your individual blood glucose readings over a single twenty-four hour period.
For more information:
- Go to:Main Carte > My Readings
- Turn your mobile device sideways or tap the graph at the tiptop of My Readings
- Tap 'i' at the summit of Expanded Graph
To modify the fourth dimension period displayed on the Expanded Graph:
- Tap the white button at the top of the screen
- Select a three-day, seven-day, 14-24-hour interval or 30-mean solar day time period from the Days list
Adding additional information to blood glucose readings
- Find the blood glucose reading in My Readings and tap it
- When the Edit screen opens, tap the round icons to add a Photograph, Activity, Meal, medication, or write or record notes
- Tap 'Done' when you are finished
- Discover the claret glucose reading in My Readings
- Tap the area around the fourth dimension of the reading to open the details; tap over again on the surface area around the fourth dimension to shut the details
Manual blood glucose readings
To add a blood glucose reading manually, in the app go to:
Primary Card > My Readings
- Tap '+' in the upper correct corner of the screen. The system uses the current engagement and fourth dimension in your mobile device for the new reading
- To change the date or fourth dimension, tap the matching button and whorl to the desired date or time. Tap 'Done' to save your pick
- To enter a blood glucose value, tap the empty claret glucose reading button, blazon the number then tap 'Done'. The Repast Marker screen is now bachelor
- The app pre-selects a Meal Marking and repast type based on the time of the reading. Tap 'Save' to confirm or tap another marker and/or repast type. Note: You tin can tap once again on a Repast Marker or meal type to de-select it. Yous can tap 'No Mark' if you do not want a Repast Marking and meal attached to this reading
- Tap 'Save' when yous are finished with Meal Markers
- The Edit screen displays so you can add details to your reading such as a photo, note, activeness, meal or medication
- Tap 'Done' to salvage the manual reading
You can change blood glucose readings that accept been entered manually, only not those automatically synced from your meter.
To do this, tap the reading in My Readings.
Here yous can add details such as a moving picture, activity or medication. With the Edit screen open, tap the blood glucose reading once again to add together a Meal Marker to the reading.
- Find the manual blood glucose reading or the listed item in My Readings
- Swipe left across the reading and tap the blood-red 'Delete' button that appears
Note that you can change claret glucose readings that have been entered manually, only non those automatically synced from your meter.
Meal Markers
These symbols are Repast Markers. Meal Markers permit your meter and app to compare blood glucose readings confronting the related target ranges, and help you lot to see how different meals affect your blood glucose. You lot can select the appropriate mark on your meter or app each time you take a claret glucose reading. There are iii variations of the apple symbol:
![]()
Fasting Meal Mark
Choose this if yous are testing your blood glucose later on about viii hours without eating
![]()
Before-meal Meal Marker
Choose this if you are testing your blood glucose within 1 hr before a meal
![]()
Later on-meal Meal Marker
Choose this if you are testing your blood glucose within ii hours after the get-go bite of a meal
The app provides Solar day Divider time periods for Breakfast, Lunch, Dinner and Overnight that y'all can change to fit your own schedule. For your convenience, the app pre-selects a repast blazon for you based on when you took the reading and the Solar day Divider it belongs to.
The Repast Mark feature is always available in the app. If yous turn off Meal Markers in the meter, your blood sugar readings tin only be marked as Earlier Meal, After Repast or Fasting when y'all are in the app.
If y'all leave the Meal Marker Prompt Screen setting on in the app, the Meal Marker screen displays automatically each time a blood sugar reading is synced from the meter.
- Open the app and tap the blood glucose reading listed in My Readings
- When the Edit screen appears, tap the claret glucose reading again to open the Meal Marker screen. You can modify or add a Meal Marker and a meal type from this screen
OR
- Open the app and tap the blood glucose reading listed in My Readings
- When the Edit screen appears, tap the Meal icon so tap 'Meal Marker'. You lot can change or add a Meal Marker and a meal type from this screen
Note: If y'all modify the Repast Mark on a claret glucose reading, it volition be compared against a dissimilar target range and may change colour based on this new target.
- Find the blood glucose reading in My Readings and tap it
- When the Edit screen opens, if you lot have never marked the blood glucose reading before, the Meal Marker screen will open automatically. If you lot have previously marked it, tap the blood glucose reading over again or use the Meal Marker button under the Meal tab to add or alter the Meal Marker and meal type
Note: You can tap again on a Meal Marker or meal type to de-select it. You can tap 'No Marker' if you lot exercise not want a Meal Marker and meal attached to this reading - Tap 'Salve' when y'all are finished with Repast Markers
- The Edit screen displays and so you tin add together details to your reading such as a photo, note, activeness, meal or medication
- Tap 'Washed' to relieve the claret glucose reading
- Go to: Main Bill of fare > Settings > App Preferences
- Change the Meal Marking Prompt screen setting to off
smartALERTS™
You tin choose to set reminders based on the time, a certain blood glucose reading, or to take medication based on your blood glucose consequence. Additionally, yous have the selection to ready a reminder as presently as a Earlier Meal reading syncs to the app.
To set upwards a reminder become to:
Master Bill of fare > Settings > My Reminders
- Tap '+' in the top right-hand corner of the app
- Follow the instructions on screen
To delete a one-fourth dimension inaugural reminder:
- Become to: Primary Bill of fare > My Reminders
- Tap 'X' on the lesser of the screen that shows the countdown time
To delete a recurring reminder:
- Go to: Main Menu > My Reminders
- Swipe left on the alarm and tap the red 'Delete' button
To temporarily disable a reminder:
- Go to: Chief Menu > My Reminders
- Tap the toggle switch to turn it off; it will turn white
Test Reminder Plans and My Patterns
You can use the Exam Reminder Plans feature to set upward a serial of reminders to come across how dissimilar activities in your life affect your BG readings, or before a healthcare visit. To prepare Examination Reminder Plans go to: Primary Menu > My Reminders.
- Tap the '+' in the pinnacle right-manus corner of the screen
- When you are prompted, select a Examination Reminder Plan. The Exam Reminder
Plans screen opens and then you tin can select a plan that fits your schedule.

Reminders you have set keep to display at the aforementioned time each day. You lot can also ready a i-time reminder to test after a 'Before Repast' reading. Test Reminder Plans allow you to fix a fixed serial of reminders over a particular menstruation of fourth dimension. They are designed to help yous manage a pattern in your BG readings or to help y'all fix for a visit with your healthcare professional.
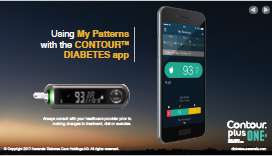
The Contour®DIABETES app can notify you lot if sure trends are detected in your BG readings. These are called 'patterns.' For case, the app may discover a pattern of high BG at lunchtime.
The My Patterns feature lets y'all:
- View helpful notifications of trends in your BG
- Acquire virtually possible causes of your patterns
- Use reminders to assist improve the design
- Runway your progress and meet how you ameliorate the blueprint over time
You can select one or more than pattern types from My Patterns on the main menu. This tells the app that you want to be notified when this type of pattern is detected.
To change your pattern notification settings go to:
Main Menu > My Patterns
- Tap 'More' in the top right-hand corner
- Tap 'Pattern Selection'
- Select the patterns that you want to track past switching them on or off
When your BG readings amend a design that you lot are working on within a certain time
catamenia, the blueprint is considered 'improved'. The app saves 'Improved' patterns in My
Patterns > Design History
The Contour®DIABETES app needs at least fourteen days of BG readings to detect certain patterns. If yous test regularly and mark your readings with meals and Meal Markers, My Patterns is able to observe patterns more easily.
You can exit a design at whatever fourth dimension and move it to your pattern history. If you get a notification about a pattern that you practice not want to track, tap 'No' when y'all are prompted to prepare a reminder and tap 'yes' when the 'Move to History' choice displays on the pattern screen.
To do this from the Main Carte du jour, become to: Main Card > My Patterns
- Tap on the design
- Tap 'Move to History'
Time and date sync
If you have automated date/time syncing turned on in the Contour ® DIABETES app, the app will automatically update your Profile ® PLUS ONE meter with the date and time.
If yous didn't switch on this feature in the initial app setup, go to:Chief Menu > Settings > App Preferences
Tap 'Time and Date Sync' toggle to turn it on.
You lot need to plough on automated date and fourth dimension syncing.
- In the app go to:Primary Bill of fare > Settings > App Preferences
- Tap the Meter Time and Engagement Sync toggle to turn it on Whenever your meter connects with the app, the time and date on the meter will automatically sync with the app
- Turn your meter on
- In the app go to:Principal Carte > Settings > My Meters and select the meter you want to sync
- Tap 'Time and Date Sync'
- Tap 'Sync now'
If you practice not have automatic date/time syncing turned on in the CONTOUR ® DIABETES app preferences surface area, the meter is not updated with the mobile device time and engagement unless you do a manual sync.
To set automatic time/time syncing between your meter and mobile device:
- Go to:Main Bill of fare > Settings > App Preferences
- Turn on Meter Time and Date Sync
Healthcare professional reports
Yes. The My Profile characteristic in the app lets you store any appointments you accept booked and contact data for your healthcare squad. Go to:
Main Menu > My Contour > Appointments to add an appointment, or get to: Main Menu > My Contour > Healthcare Squad
You can send a summary study of your blood glucose readings from the app but you must have added either an date or a healthcare professional person outset.
- Get to:Main Carte > My Profile > Appointments
- Tap an upcoming date
- Tap 'Send a Blood Carbohydrate Report'
Or
- Go to:Primary Bill of fare > My Profile > Healthcare Team
- Tap 'Send a Blood Sugar Report'
Yes, you tin export your BG data as a CSV file. This file is unformatted and just contains
raw data. To practise this, go to: Main Menu > My Intendance > Reports
- Tap 'Send a CSV file'
- This will open a new electronic mail on your mobile device then that yous can send the file to a recipient of your selection
Target ranges
Yep. Although target ranges may have been confirmed on the Profile ® PLUS 1 meter, you lot tin merely change them from the CONTOUR ® DIABETES app. Y'all can practice this at any fourth dimension by going to:
Main Menu > Settings > Target Ranges
Each time you connect your meter to the app the meter is updated with the current app target ranges if they have inverse.
You should consult your doc or nurse before setting or changing your target ranges.
Yeah. You can modify target ranges from the app at any fourth dimension by going to:
Main Menu > Settings >Target Ranges
You tin modify the high and low limits of your Before Repast (same as Fasting) and After Meal (same as Overall) target ranges when y'all slide the handles up or down. You can also use '+' or '–' to move a value upwardly or down.
Y'all should consult your doctor or nurse before setting or irresolute your target ranges.
In the app, go to:Main Menu > Settings > Target Ranges.
The Disquisitional High handle has a yellow outline. This is the highest claret glucose value you can set up. The Critical Depression handle has a red outline. This is the lowest value y'all can set. Slide the handles up or down to modify the Disquisitional Values. Yous can as well utilise '+' or '–'to move a value upwardly or down.
You should consult your doc or nurse before setting or changing your disquisitional loftier/low settings.
Yous take probably not synced (connected) your meter with the app since you last changed the targets in the app. To sync your meter with the app:
- Switch your meter on and make sure it is near to your mobile device
- Make sure the Bluetooth® setting on your mobile device is turned on
The CONTOUR ® DIABETES app should now be able to sync information with your CONTOUR ® PLUS ONE meter and update your target ranges.
Your meters may have different target ranges, but this is non recommended. Your meters should stay in sync with the app target ranges. Paired CONTOUR® meters are updated with the most recent app targets whenever they connect to the app.
As soon as y'all pair your CONTOUR®PLUS 1 meter to the Profile®DIABETES app, you lot are able to add a Meal Marker to a blood glucose reading. Since every Meal Marker is evaluated against a related target range, the new ranges associated with each Meal Mark become available for you lot to see.
The Fasting Target range is always preset to be the aforementioned as your Before Meal Target Range, and this range tin be inverse in the app. The meter displays a separate Fasting Target because it has a Fasting Meal Marker fastened to it.
Your Profile®Deject account
When you open the Contour ® DIABETES app for the first time, you will be prompted to create a Contour ® CLOUD account. Creating an account ensures that your personal information is backed upwardly securely, and allows you to access it from any of your compatible mobile devices.
To create an account from the initial app setup, just follow the instructions on screen.
- When asked for a CONTOUR ® CLOUD ID enter your electronic mail address. You should use a personal email accost that you check oftentimes
- Next you will need to answer a series of questions, which are used to create a section chosen About Me. (Your Nigh Me section tin can be edited later account creation and tin can be constitute under My Contour in the Carte du jour section of the app.)
- Verify account by clicking the link emailed to you by Profile® Diabetes Solutions
- Tap 'Continue' on the app screen
If you have been using the Contour ® DIABETES app in Invitee style and want to create an account:
- Go to: Settings > Create an business relationship
- Follow the instructions on screen
- Verify account past clicking the link emailed to you by CONTOUR ® Diabetes Solutions
- Tap 'Continue' on the app screen
No. It is best to stay signed in to your app account even when you close the app. When y'all stay signed in to the app on one or more mobile devices, your information is backed upwards regularly and all the app features are bachelor to you.
- Go to:Main Carte > Settings > Account Settings.
- Tap the e-mail address to modify information technology.
Creating a Contour ® Cloud business relationship will help you to go the well-nigh out of your CONTOUR ® PLUS One meter by unlocking all the features that the app has to offer. Creating an business relationship volition besides allow the app to store your blood glucose readings in the CONTOUR ® CLOUD so that you can view your data from upwardly to 4 different meters on multiple mobile devices. Follow the instructions on screen when y'all open the app to ready an account. Your mobile device will need to be connected to the internet for this to piece of work.
If you've prepare a Profile ® CLOUD account, your app data is automatically backed upwardly to the CONTOUR ® Deject regularly when your device is connected to the cyberspace. If yous sign in to the app every bit a Guest, your information is not saved or backed upward to the cloud.
No data that can be identified every bit yours is shared with whatsoever person or business unless you choose to share it with someone, for example your doctor, nurse or caregiver. You can view our privacy policyhere.
Troubleshooting
Your meter and app must be in close range of each other to stay connected. Try moving your meter and mobile device closer together.
If your CONTOUR ® PLUS ONE meter is not connecting to the Contour ® DIABETES app, check that:
- Your meter is switched on
- You have paired your meter with the app on your mobile device
- The Bluetooth® settings on your meter and mobile device are switched on
- Your meter is shut to your mobile device
At that place are at least two possible reasons for this error message:
- You are not connected to the Internet. Cheque your Internet connection and brand certain that the Mobile Data feature is turned on in your mobile device settings (Notation: Cyberspace/Data usage fees may apply.)
- Your network ambassador has ready proxy or firewall restrictions on your network
- Talk to your network administrator nearly allowing connection to CONTOUR ® ONE servers from your mobile device
- Consider trying an culling Net connection such as switching to mobile data or connecting from your home. Note: Cyberspace/Data usage fees may apply
Yep, there is a Help department in the menu of the app. To access it, go to:Chief Menu > Help
From the Help screen you lot tin search topics using key words, or scan the help categories displayed.
If you lot withal need assistance, contact Client Services past calling the number on the dorsum of your meter or using the form here. Y'all can also admission this link via the help section of the app.
Source: https://www.contourplusone.sg/help-and-support/
0 Response to "How to Delete a Reading From Contour App"
Post a Comment